

WordPress comes in two flavours.
WordPress.com is a commercial website, where you can host your own website for free, but with limitations.
WordPress.org is where you can download and install your own copy of the WordPress CMS (Content Management System) software for free and use it's full powers.
WordPress.com is a great starting point for bloggers, but due to it's limitations it is not the right platform for growth.
If you have reached your limits at WordPress.com and you feel it is time to migrate to a self-hosted WordPress blog, then you are at the right place.
This tutorial will outline how to migrate from WordPress.com blog to a self-hosted WordPress CMS at Kualo.
Prerequisites:
- Domain name. This will be your blog's new address. It could be anything from: your-name.com to johns-blog.org. We have been providing affordable domain registration services for more than a decade. Get your Domain name HERE if you do not own one already.
- Web hosting. You will need WordPress optimized hosting environment. Top of the line hardware with fast, secure and stable configuration. We have got all of that covered! Compare our web hosting plans here. Should you need advanced hosting solution? Check out our cloud hosting service.
Going Forward:
So far you should have your domain name and web hosting service linked up.
Login to your web hosting control panel and install WordPress from Softaculous.
Pretty simple, right?
Once you have the WordPress up and running, it is time to setup the Theme and Plugins.
We have details tutorials how to do both of these here:
How to install and manage WordPress themes
How to manage your plugins in WordPress
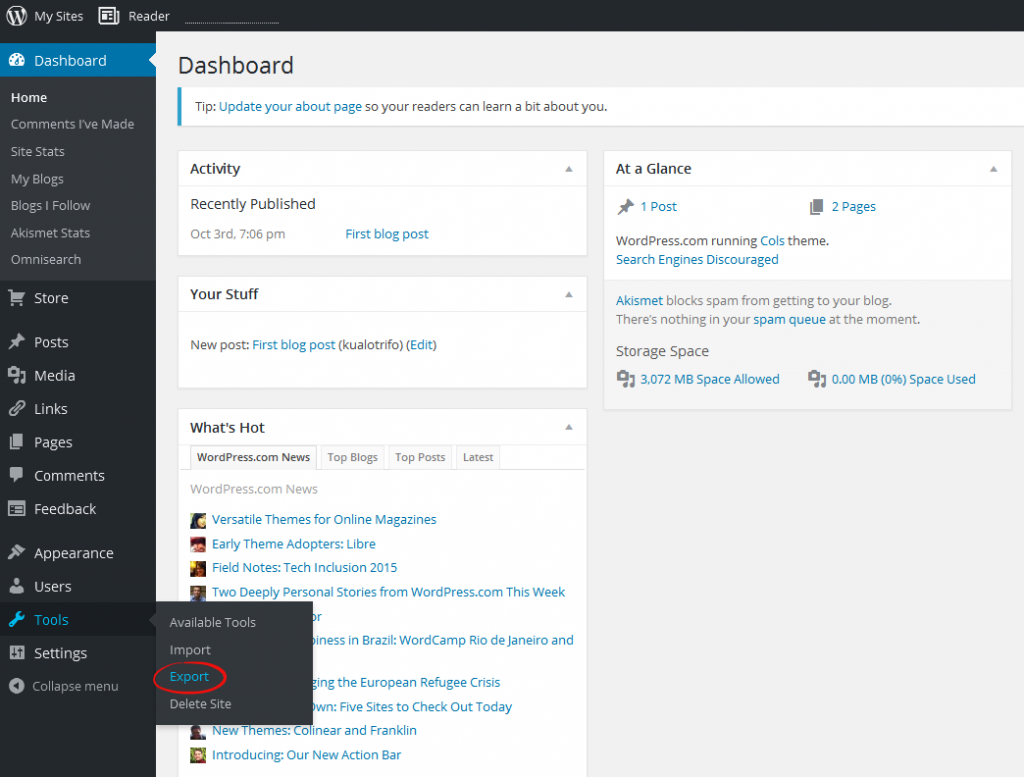
Now it is time to login to WordPress.com to export your data - posts and comments.
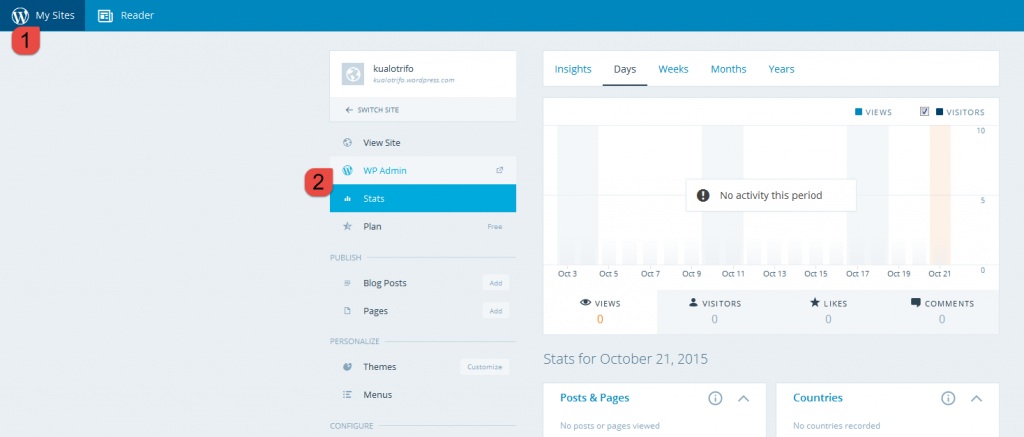
Login to WordPress.com and go to My Sites WP Admin:
If you have multiple sites, select: <- SWITCH SITE, then the site you want to export.
Now go to: Tools Export:
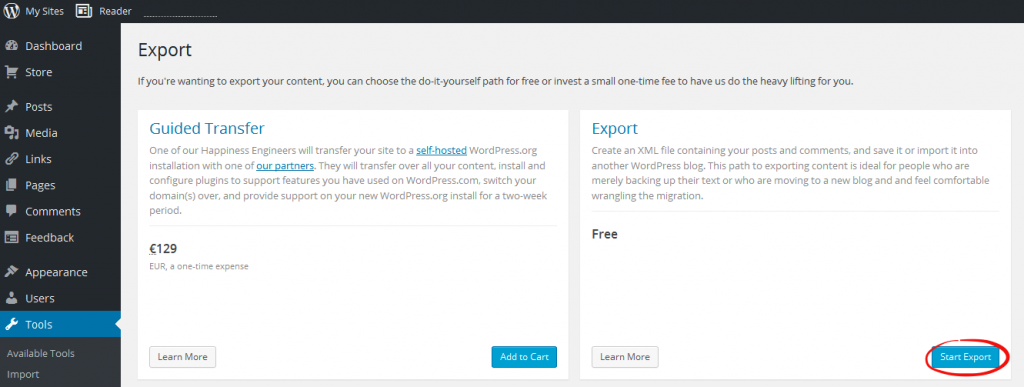
and click on Start Export:
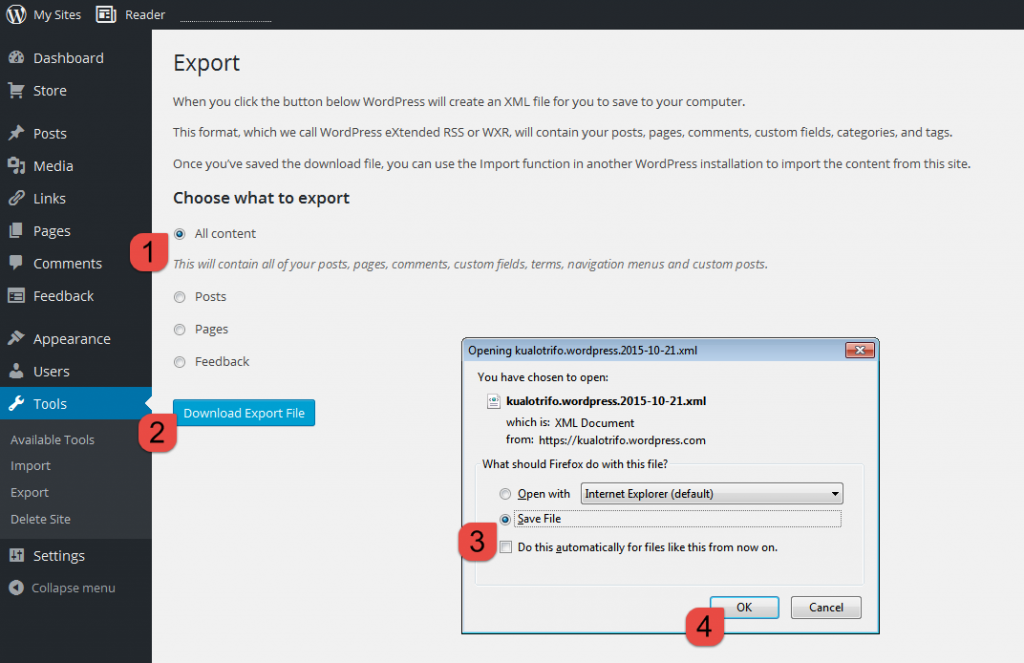
Choose what to export: select: All content and click on Download Export file.
Save the file to your local computer (your Desktop for example), you will need it later.
It is time to import your content from WordPress.com to your self-hosted WordPress Content Management System.
Go back to your self-hosted WordPress Dashboard and go to: Tools Import:
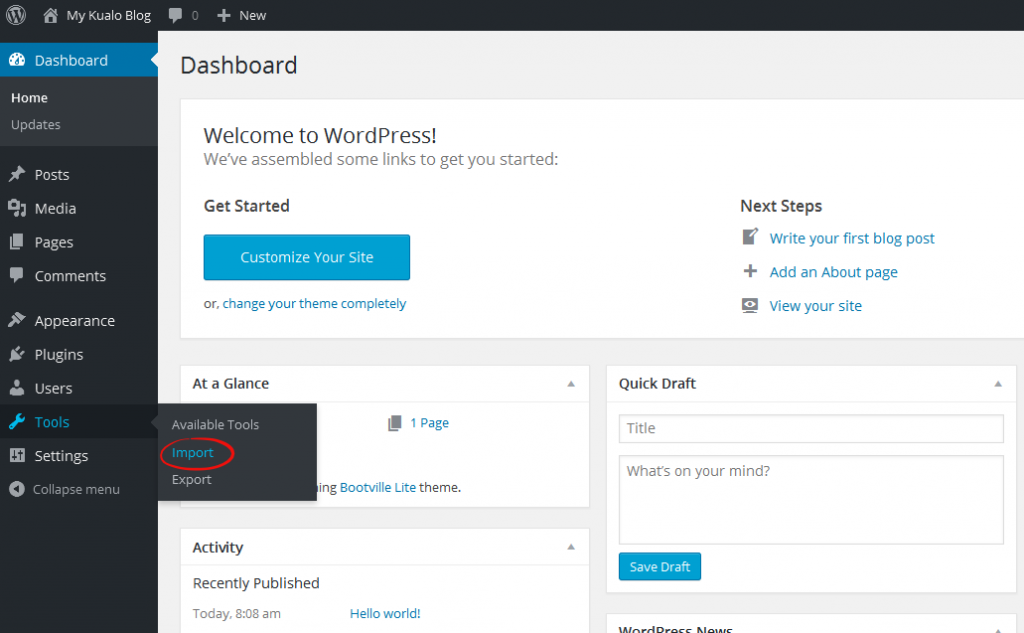
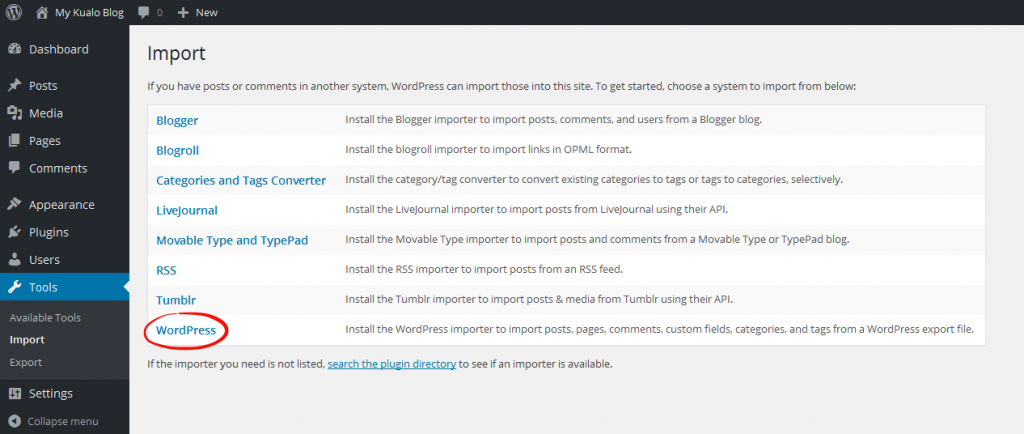
We are importing WordPress.com xml file, so select WordPress on the Import page:
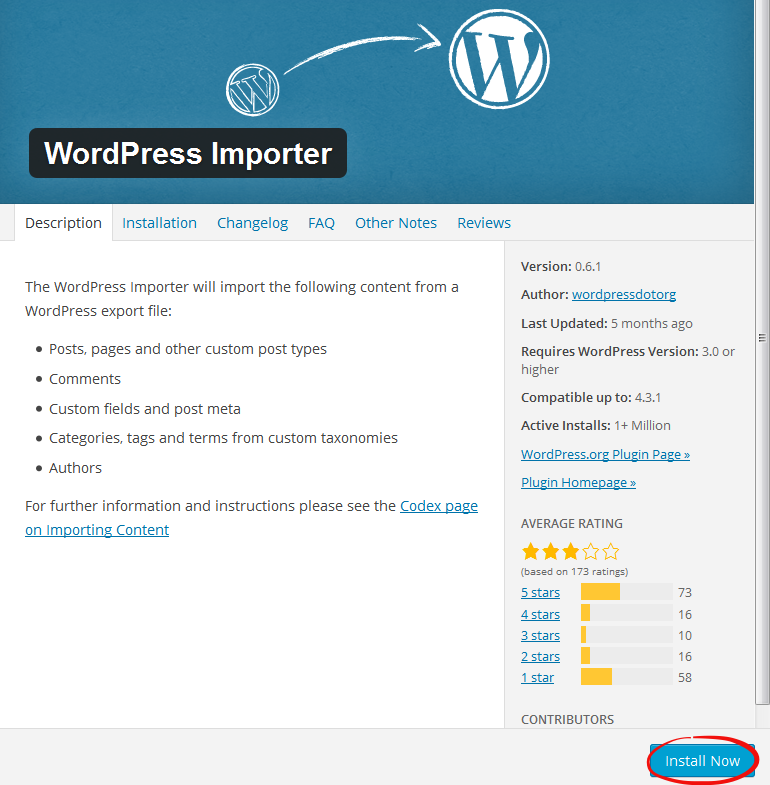
By default the WordPress Importer plugin is not installed, so WordPress will ask you to install it.
Click on the blue Install Now button to install the plugin:
Once the installation is completed, click on Activate Plugin & Run Importer:

Click on Browse... to select the file that you have exported from WordPress.com and saved to your local computer:
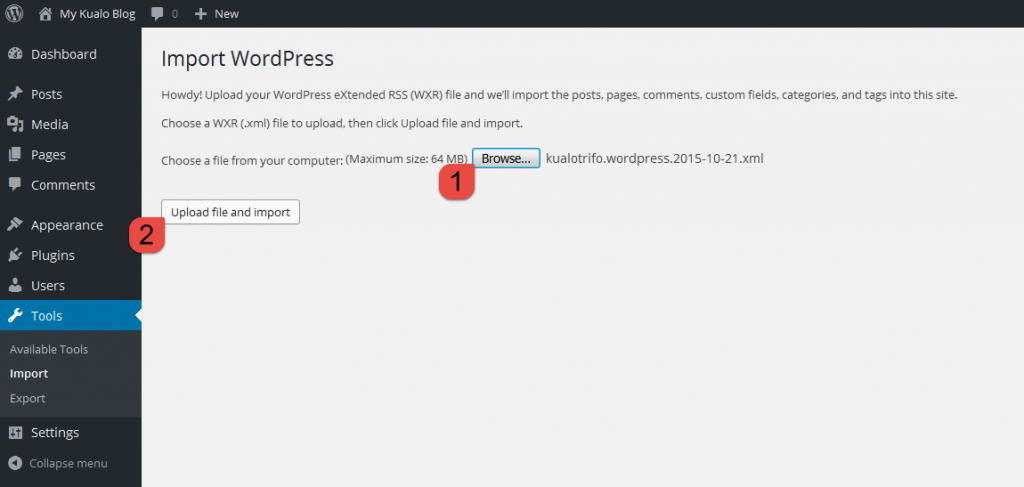
then, click on Upload file and import.
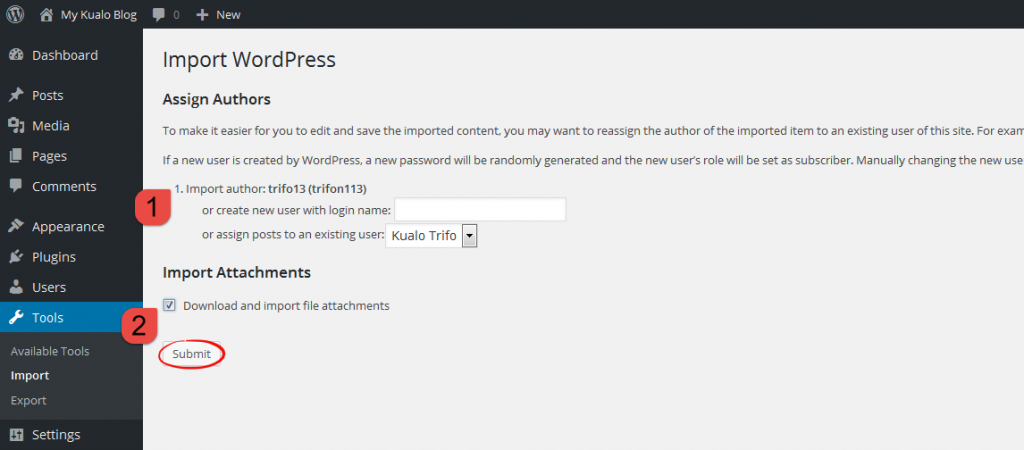
On the next screen you will be assigning author of the imported content.
You have two options:
- create new user with login name
- assign posts to an existing user
That's it. All done. Have fun!
Your self-hosted WordPress Content Management System is ready to use now.
You can check in with our articles on Securing your WordPress Installation, Protect WordPress from distributed brute force attacks and WordPress – Faster, Stronger, Better! which will help you to to improve your self-hosted WordPress experience.
Interested in migrating WordPress over from another hosting provider?
Too complex?
Have us migrate the website for you.
Just raise a ticket from your MyKualo client area.